Friday, September 17, 2010

Countdown Calendar

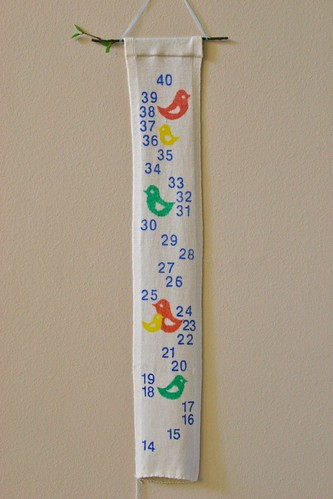
This countdown calendar was inspired by Patrick Frey's Gregor Calendar. To create the design, numbers are drawn onto a sock blank. The calendar is meant to be slowly unraveled to count down to your big event. Mark the time until a delivery, graduation, retirement, holiday, or anything else you're waiting for.


Supplies

sock blank
markers
stencils (optional)
tapestry needle
yarn or thread
dowel


Instructions

1. Block the sock blank. Despite having a ribbed edging on either side, my sock blank curled a lot when I first took it out of the package, and it needed to be blocked. I was tempted to use SOAK. It probably would have been okay, but I was skittish about whether that would affect how the fabric would take up the color afterwards, so I just used water to wet block.

2. Lay out the sock blank, making sure to orient the edge that unravels at the bottom. It is a good idea to have something underneath to protect your work surface. I had blocked mine on top of a foam playmat, and I just left it on that.

3. Measure the length of the sock blank and calculate how big your numbers can be. You want to make sure that the numbers don't overlap. Remember to allow 2-4" at the top to form a casing for the hanging dowel. I was able to make my numbers 1" high, with 1/4" vertical distance between numbers.

4. Draw in your numbers and graphics.
a. I used stencils in an easy-to-read font (Helvetica). They were translucent, which made it simple to line things up. The graphics were inspired by a baby shower theme at Hostess with the Mostess.
b. The markers I used were Le Plume II by Marvy Uchida. I like them because the marker tips give you good control without skimping on coverage. If you're used to how these markers look on paper, though, keep in mind that the colors will be much more saturated on the knit fabric--more like the color of the marker tip rather than the cap. In case you're wondering, I also experimented with fabric paint, but that did not work at all; it was messy and clumpy.
c. Be patient with the markers, allowing time for the knit fabric to take up the color. I found that a stippling motion helped.

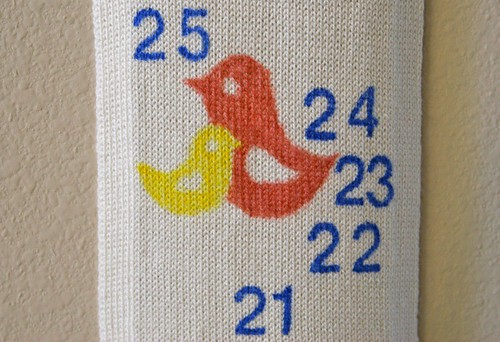

5. Fold down the top 1-2" towards the back. Use the tapestry needle with either yarn or thread to sew down the edge, making a casing.

7. Insert dowel and hang.
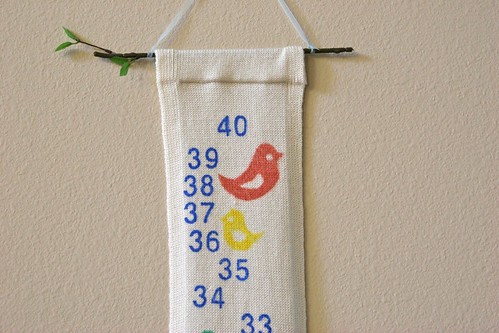

Have fun unraveling!


Sunday, April 11, 2010

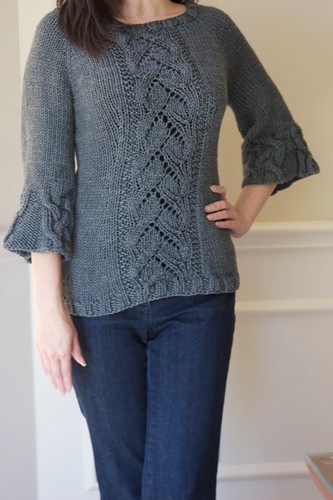
Chic Cables & Lace (& Cowl Neck)

IMG_3949

IMG_3943

Completed: March 2010

Pattern: Chic Labels and Lace Cowl Neck Sweater, by SweaterBabe

Yarn: Berroco Comfort Chunky (50% nylon, 50% acrylic), #5713, 5 x 150yd/100g

Notes: I loved Yantarik's idea (Rav link) of making the cowl detachable, so I did that too. I made my cowl a bit smaller--only up to row 42. After that row, I did the decrease row and bound off. I found that my cowl stayed in place when I wore it, and so I decided not to add any sort of attachments. If things start to slip around later, I’ll put some small buttons on the cowl. With yarn at this gauge, if I use a small enough button, I can button right through the neckline of the sweater without needing any buttonholes.

IMG_3951

IMG_3952


For the neck, I cast on 88 sts for size XS. This was 2 more than the original pattern calls for, but I needed a multiple of 4 to make 2x2 ribbing. Although I didn’t think to do it originally, I went back and made the ribbing using 2 needle sizes smaller, to prevent it from flaring out. After 3 rounds of 2x2 ribbing, I continued with the directions for short-row shaping except that 26 stitches were knit on the first short row, and the first set of 2 increases were ignored. This got me back to the right number of stitches. Unless I missed it, there weren’t any instructions for working the short-row wraps with their stitches, but I did it anyway.

Like in the other Sweaterbabe pattern I made, this one calls for the sleeves to be made before the body. I always think it’s a better idea to make the body first, though, since the shaping there is more critical and since having a completed body allows you to try it on and figure out how you want the sleeves.

IMG_3947

The pattern uses the abbreviation “p-inc,” which is not defined as far as I could tell. I assumed this was a PFB, which was defined, so that’s what I did, and it looks fine.

On the sleeves, I cast off in knit, rather than in pattern. This helped to counteract the slight tendency of the reverse stockinette portions of the sleeve to curl in.

IMG_3956

I decide to omit the belt since I didn't feel like it needed one.

IMG_3936


The yarn was a bit splitty, but not unreasonably so. I really like it and think it’s a great alternative if you want the bulky yarn look but don’t want a garment that’s going to be too warm.

Thursday, April 1, 2010

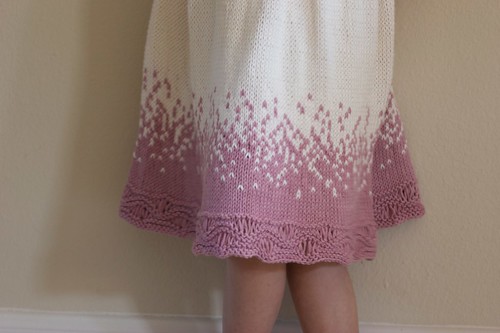
Yoshino


Completed: March 2010

Pattern: Oriental Lily, by Georgie Hallam

Yarn: Rowan Purelife Organic Cotton DK (100% organic cottn), #986, 3 x 131yd/50g; #983, 1 x 131yd/50g; #982, 0.2 x 131yd/50g

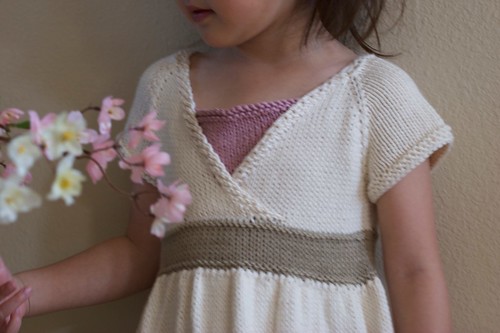
Notes: My inspiration for this dress was the cherry blossom tree. I love the fluffy white blooms that gradually turn more pink before eventually cascading down and covering the ground. At our previous house, we had Yoshino trees that would herald the arrival of spring, and it always made me smile to look at them.


I used the Oriental Lily pattern to give me some guidelines for knitting the surplice top. I continued making increases until the top fit my daughter, who is a petite 4-year-old (I started this before the designer updated the pattern to include larger sizes).


The sash was done by knitting 1 round, purling 1 round, knitting 6 rounds, and finally purling 1 round. After switching colors and knitting 1 round for the skirt, I doubled the stitch count by knitting into the front and back of each stitch. The skirt is knit straight after that. The color transition at the bottom of the skirt was done with the help of a random number generator (I discuss this further on the main blog). The bottom of the skirt has a modified seafoam stitch.


The sleeves are obviously short and have a garter-stitch hem. I knit a small triangle to sew behind the surplice bodice, both for modesty and to bring the pink color to the top.


Monday, March 15, 2010

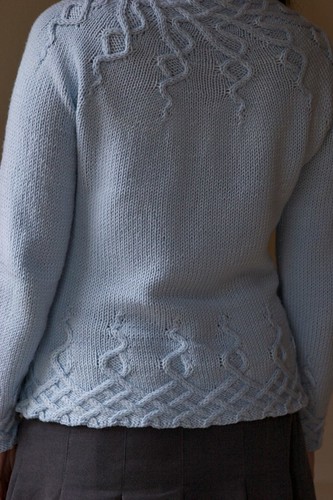
Wisteria


Completed: March 2010

Pattern: Wisteria, by Kate Gilbert

Yarn: Sublime Yarns Extra Fine Merino Wool DK (100% extra fine merino), #0002, 9.5 x 127yd/50g

Notes: I followed Larisa’s modifications for this one (Rav link). The waist was slightly altered to fit me better, and I knit the sleeves as she did. Since I followed the 37” size, I picked up just 1 extra stitch for the sleeve, for a total of 60. This matched the final stitch count needed for the sleeve, so I just knit straight till I reached the cables. Then, I followed the chart as if all the knit stitches were already filled in and disregarded the directions to make more stitches. The sleeve cable was extended by a few extra rows to match the length of the bottom hem cable. On the last row of the cable, I kept all the purl stitches in pattern and did not convert any of them to knit stitches the way they are on the hem.